The original Arduino Spot Welder case has a separate fuse case to make it universally usable for direct mount to a car battery or use with a Lipo battery.
This design made by Vad-Z integrates the fuse inside and also has an XT30 connector integrated to interface towards the foot pedal. Its very nice for use wth a Lipo battery so i want to share it here.
The STL files are available to download from Thingiverse.
https://www.thingiverse.com/thing:4605059
https://www.thingiverse.com/thing:4615536 (with integrated stand offs)
Necessary Materials
Originall intended by the designer is the use of the following materials:
Stainless steel hardware:
2x M6x12 bolts
2x M6x16 bolts
4x M6 nyloc nuts
M6 washers, 7x small and 4x large (for the fuse)
4x M3x10 bolts – must be with socket cap head (Unbrako) – for the top cover
4x M3x8 bolts – must be with countersunk head – for the bottom of the stack
4x 3x15mm nylon spacers (to mount the power board)
4x 3x12mm nylon spacers (to mount the control board to the power board)
Misc. 3mm nylon screws or nuts, depending on spacers used
1x M6 cable shoe (for the + connection)
2x XT30 connector (male and female)
Material I used
I did not have all the required materials on hand so i changed the assembly a little bit. What i used:
Screws:
4x M3x30 bolts (better use M3x35 if available)
4x M3x12 bolts
4x M3x10 bolts
4x M3 Nuts
8x M3 Nylon Nuts
4x M6x10 bolts
4x M6 nuts
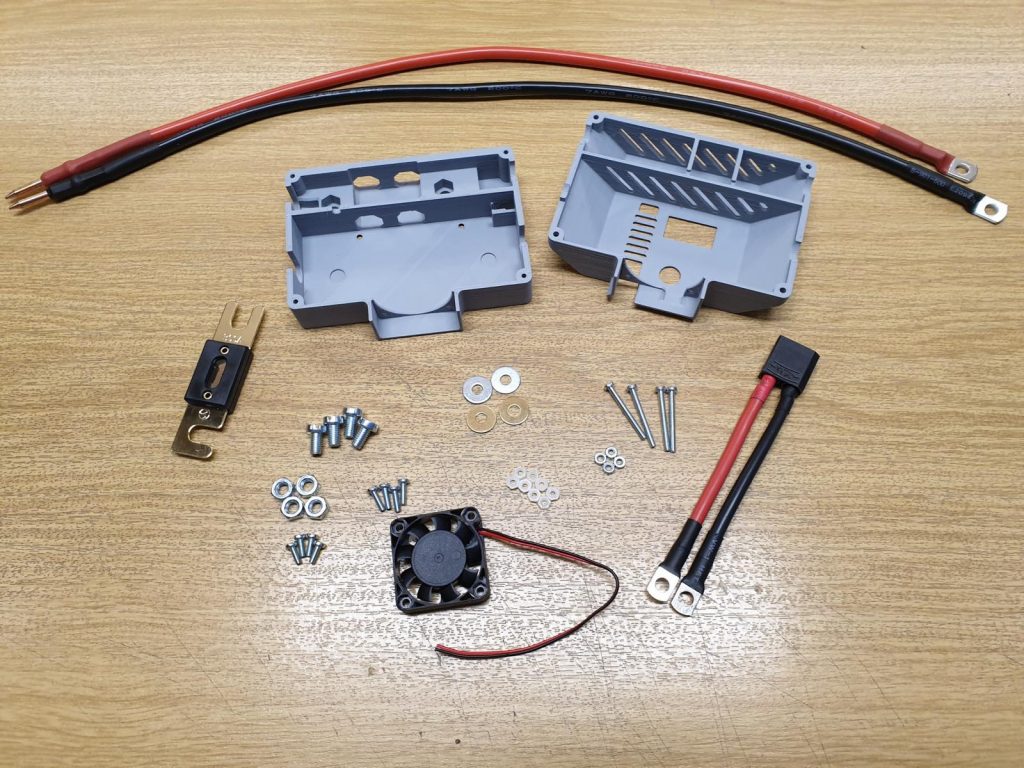
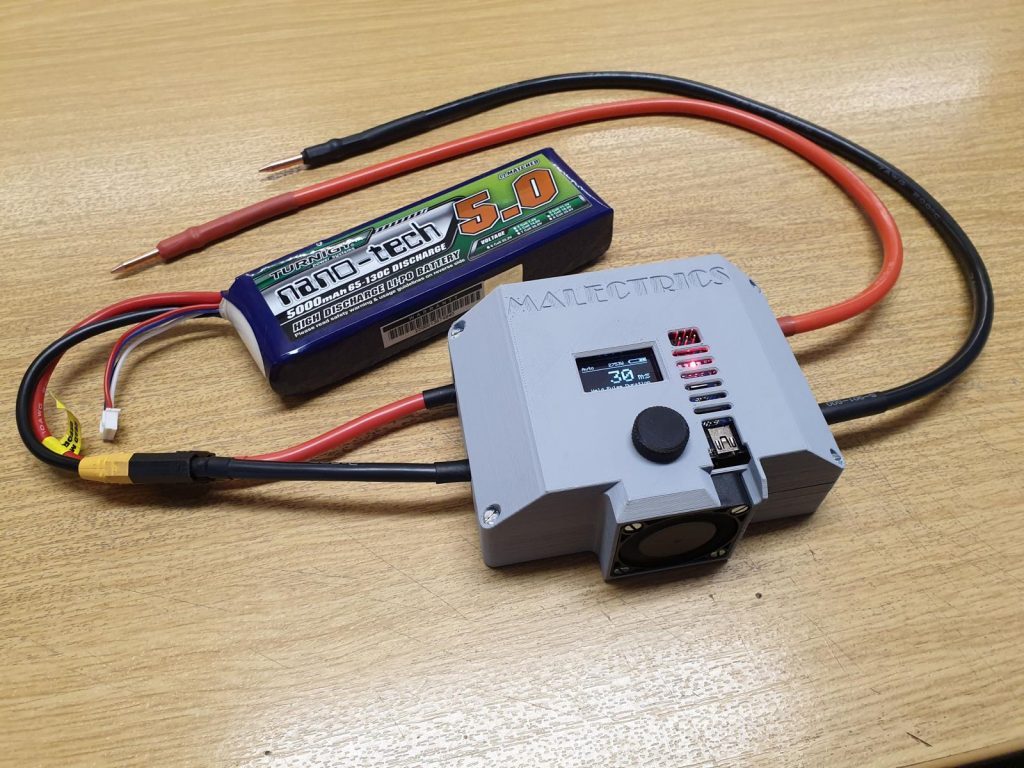
Spot Welder Parts
40x40mm 12V fan
rotary encoder knob
XT90 adapter cable
Welding Cable Set
Prebuilt Kit
Assembly
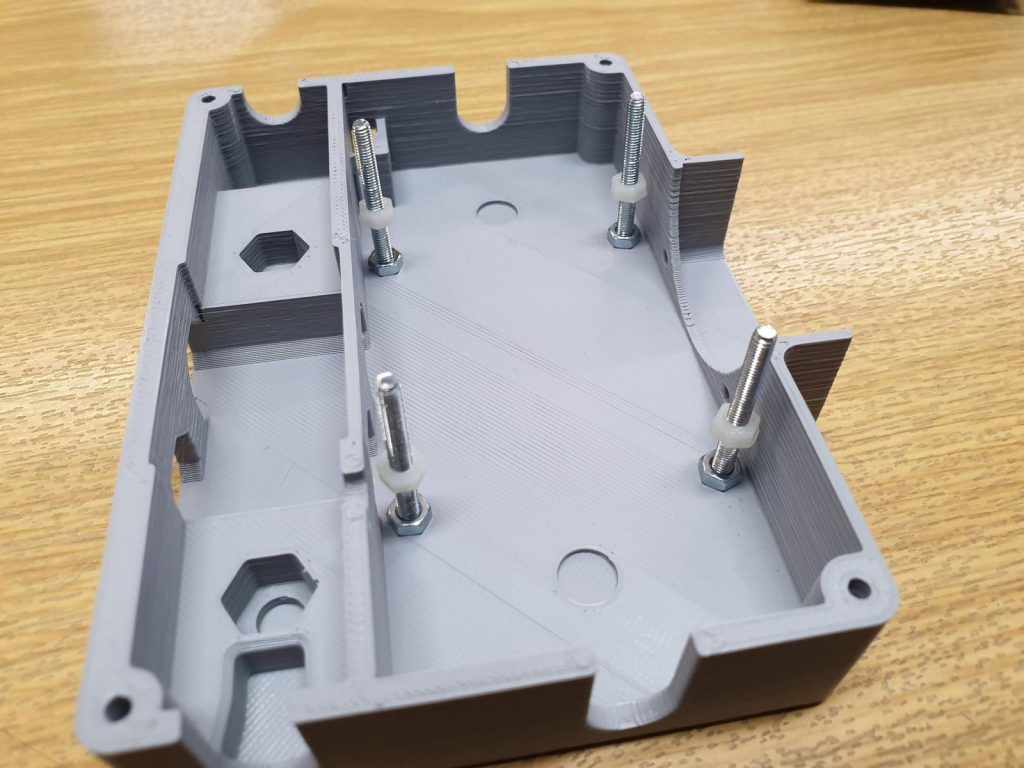
First the 4 M3x30 screws are screwed to the bottom half of the case with m3 nuts. These screws are used here instead of the spacers intended in for the design.
It would be better to use M3x35 screws, so the welder later sits flush to the upper shell of the top half of the case. But the biggest i had here was M3x30 screws.
Then 4 of the M3 Nylon nuts are used as a spacer were the prebuilt kit will sit on later.
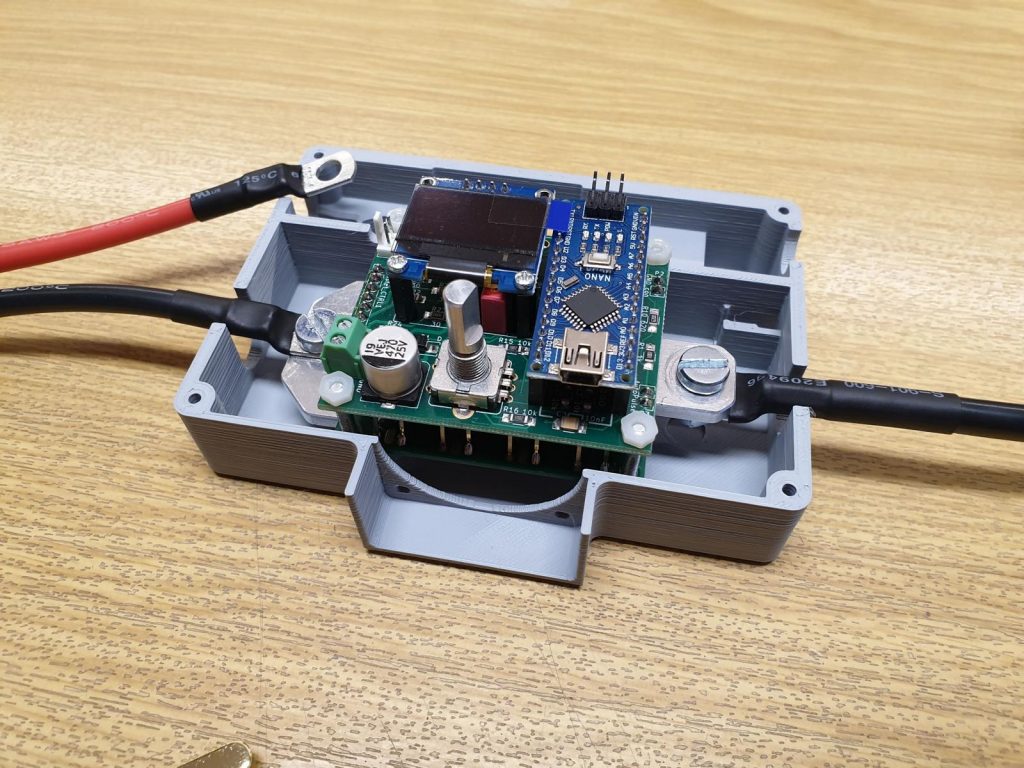
Now the prebuilt kit is pushed onto the 4 M3x30 screws. The screws should just stick out the top holes enough that 4 m3 nylon nuts fit there.
Also make sure you have attached the negative cable of the XT90 connector and the negative welding cable to the prebuilt kit before assembling it in the case.
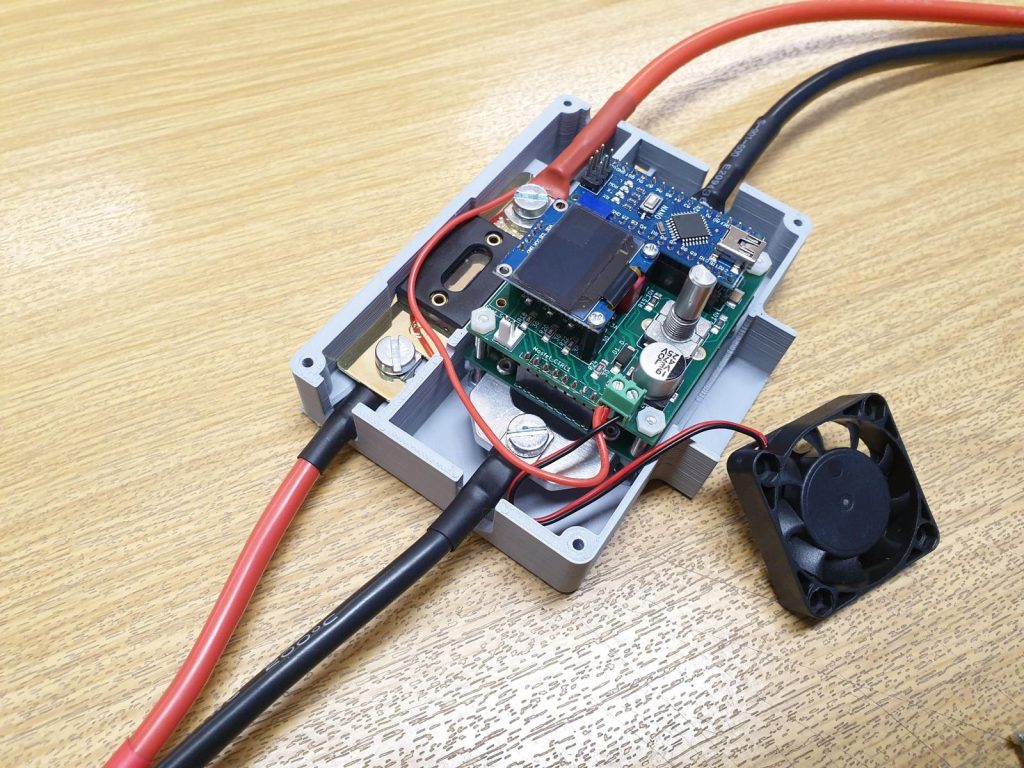
Next the fuse, fan, positive welding cable and 12v cable is added. I cactually mounted the fuse without washers because i did not have M6 washers available. Just M6x10 screws and M6 nuts are used. It holds ok, but would be better with washers.
I did not add the XT30 connector for the foot switch to the case because this welder will be used in auto mode only.
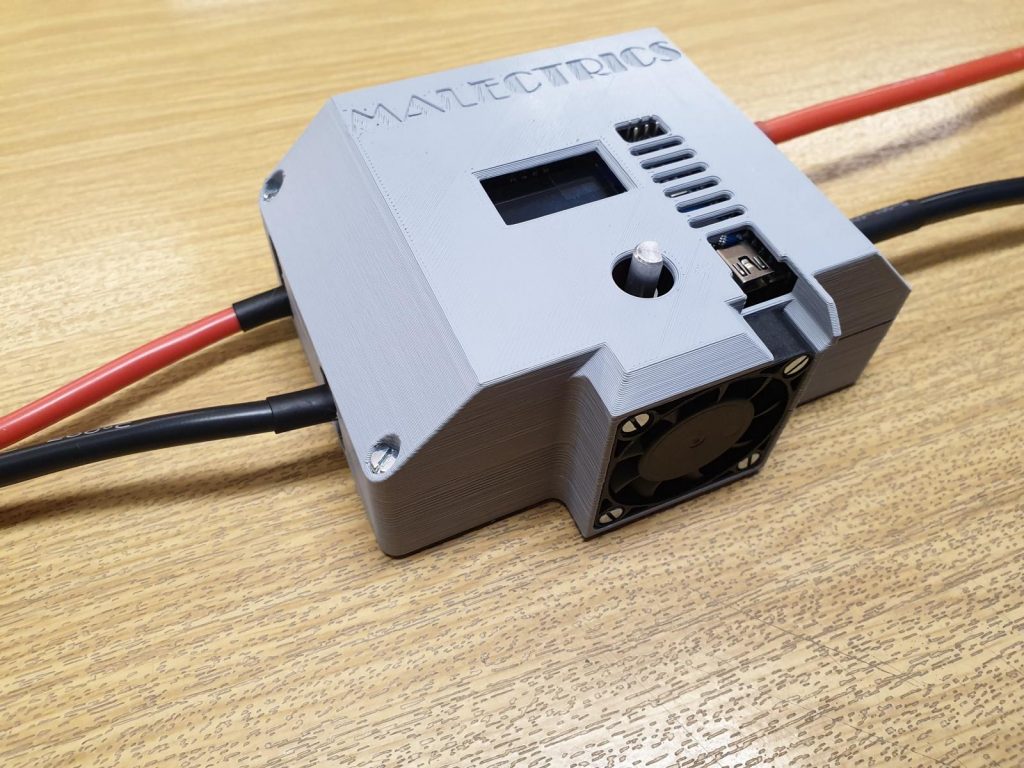
The top half of the case is screwed to the bottom half with M3x12 screws and the fan is then screwed to the case with M3x10 screws.
Finally the rotray encoder knob is pushed onto the rotary encoder shaft and then the case is ready.
The STL for the rotary encoder knob can be found here: https://www.thingiverse.com/thing:2600227