There is a new Version of the Spot Welder available. Read more to find out what has changed in V4
In V4 the Mosfet Board and also the Arduino Board have been redesigned. Although the maximum welding current and input voltage range stays the same as before (10 -14V, maximum 800A) there are some major improvements.
Changes on the Arduino Board:
- Buzzer: With the buzzer alarms will not only be displayed on the screen but also be audible for the user. This makes it much easier to notice an alarm while working with the welder.
- Temperature Sensor: The temperature sensor will trigger an alarm and disable welding when temperature reaches 65°C to protect the welder from overheating.
- additional 470µF Capacitor: With now two 470µF capacitors it is possible to use weld times up to 100 – 150ms without the risk of the Arduino Nano rebooting. The reboot could happen in V3 at very long weld times because the voltage at the Arduino Nano dropped to low dring the weld.
- SMD Mosfet Driver: the mosfet driver chip has been changed from the through hole version that was plugged in a socket to a SMD version that is directly soldered to the pcb. The SMD version eliminates eventual contact problems that could happen with the through hole version when it was not plugged in the socket correctly.

Changes on the Mosfet Board:
- SMD Mosfets: The mosfets have been changed from through hole version to SMD. That will eliminate the problem of failing mosfet legs in V3 on very high currents.
- new aluminum parts: there are still two aluminum parts used on the mosfet board but the parts are just straight and both the same size. This makes producing or modding them for DIY users much easier.
- Stronger Protection Diodes: The protection diodes on the bottom of the mosfet board have been changed to a much stronger version. They are rated for the same current as the ones in V3 but can take much higher short peak amps and have better heat dissipation because they are phisically bigger.


New Case Kit:
The size of the welder and also the shape of the aluminum parts changed. It will not fit in the case of previous V3 welder. The new V4 case now integrates the welder, fuse and fan in one case, so there is no longer an additional fuse case needed.

Possible configurations of the Arduino Battery Spot Welder V4
You can use the welder in differnet configurations to best suite your usecase. The welder is exactley the same in all configurations, only the connection the the battery is different.
Lipo Battery Configuration
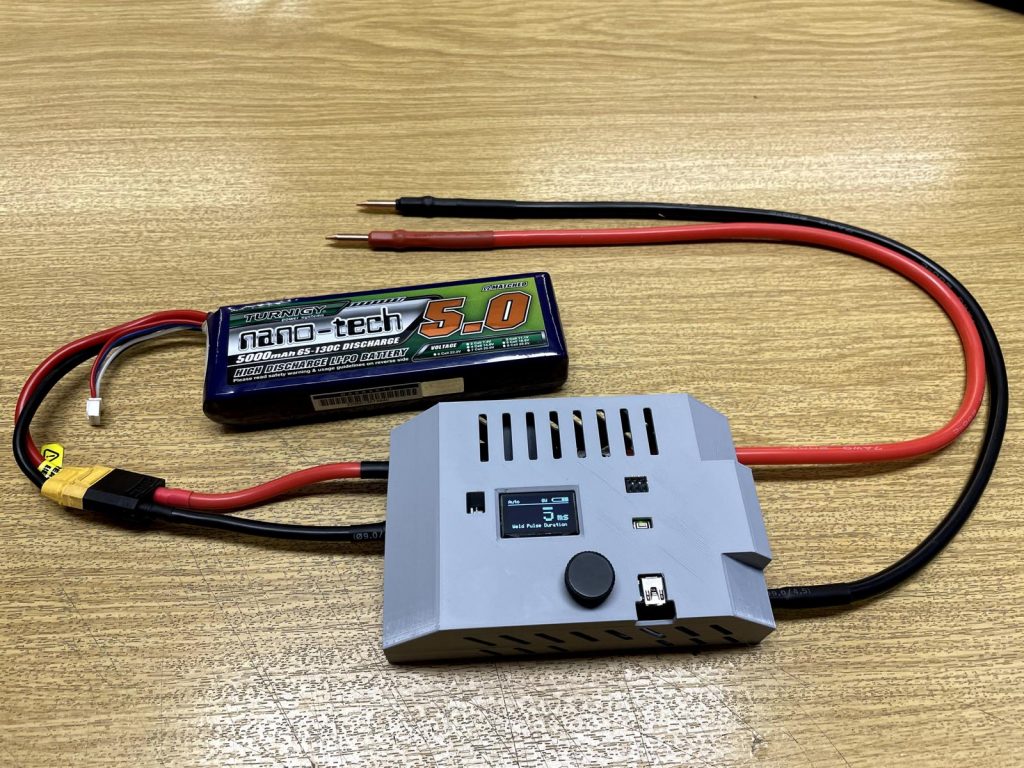
This is the most compact and portable posibility to use the welder. The Lipo battery configuration is recommended for people who only need te welder from time to time and dont want to built huge batteries with thousands of welds. A 5000mAh Lipo will last you for about 500 – 700 welds before it needs to be recharged. Also on heavy use (a lot of welds in short time) the Lipo can become hot and then need some time to cool down. This can already be the case after 200-300 welds depending on your Lipo battery and how quickly you weld.
Car Battery Configuration

With the car battery the setup is not that compact but the big benefit is that you can do a lot of welds before it needs to be recharged. For example the 60Ah battery you see on the picture can do a few thousand welds before it needs recharge or a break. Please still recharge your car battery after each weld session because these batteries like to be fully charged and only discharged to about 50% capacity. This way you get the maximum lifetime out of the battery.
Minimal Setup

Its also possible to use the welder without the case in a minimalistic setup. For this you only need the prebuilt kit, welding cable set and battery terminals. Thats also the setup that will pull the maximum performance from your car battery because there are no losses through the fuse or the battery extension cables. When you use it this way please take good care that you dont accidentaly short something with the cables. Because in this configuration there is no protection from a fuse.
I have a v3.3 welder .it doesn’t allow time to make a weld.it tries to weld instantaneously when I touch the probes on the metal to be welded.could I buy a v4 and use the other parts that I have?
You can use the welding cables and XT90 / battery cables and foot switch also on the V4 welder.
The case of the V3 does not fit for V4.