This Tutorial will show you how to upload the latest Spot Welder Software V3.3.2 to your Arduino Nano. (Its exactley the same procedure for V3.3.3 and V3.3.4)
For older Versions see:
The Software is compatible with all V3 and later Arduino Spot Welders.
To upload the Arduino Code of the Spot Welder V3 to the Arduino Nano you need to do some preparation.
- download the Arduino IDE from https://www.arduino.cc/en/Main/Software (V1.8.9 used for this Tutorial)
- download the Arduino Code from Github
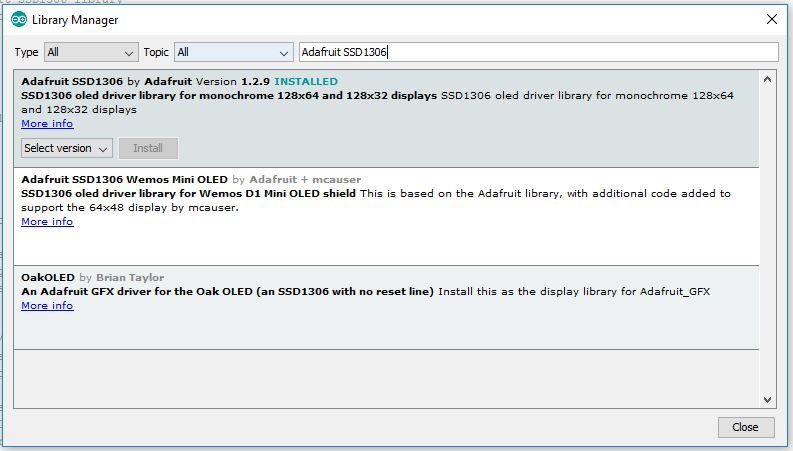
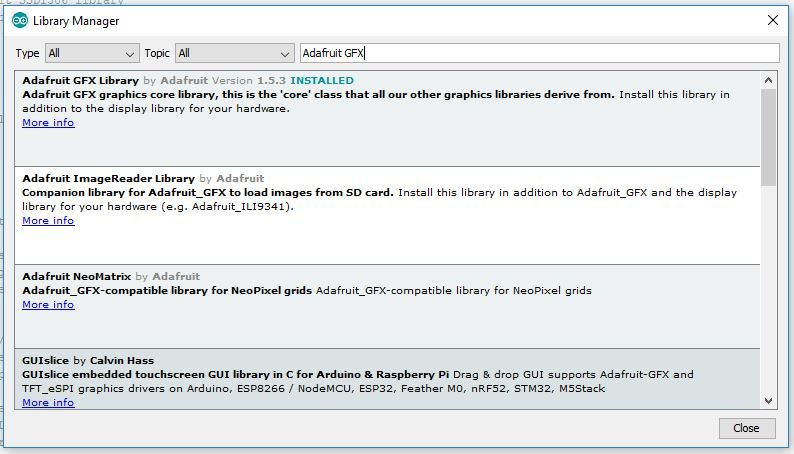
Once you have installed the Arduino IDE you need to add two libraries. The “Adafruit_GFX” and “Adafruit_SSD1306” library.
Versions used for this Tutorial:
- Adafruit SSD1306 V1.2.9
- Adafruit GFX V1.5.3
Install them through the library manager in the Arduino IDE (click: Sketch -> Include Library -> Manage Libraries)
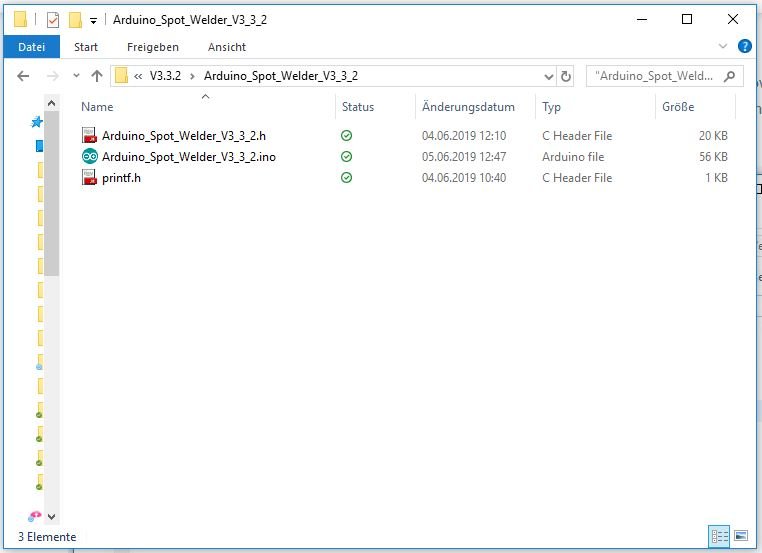
Now you can open the Arduino Code from the Github project you downloaded. The file is the Arduino_Spot_Welder_V3_3_2.ino . Make sure all unziped files of the Spot Welder code are in the same folder and the folder is named Arduino_Spot_Welder_V3_3_2 .
Connect the Arduino Nano to your computer with an USB cable and it should automatically install the drivers for the Arduino Nano. If it does not connect you need to install the driver for the USB chip manually. CH340 Windows Driver – CH340 Mac Driver – CH340 Linux Driver
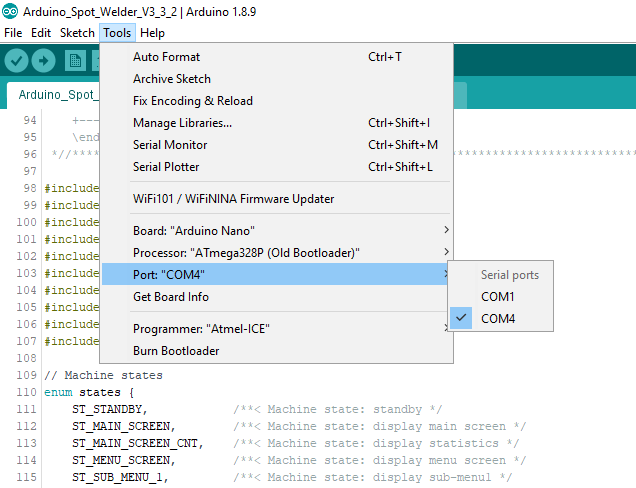
If the Arduino is connected correctly a new Com Port should show up in your Arduino IDE under Tools -> Port
Select the new Com Port . Also select as Board: “Arduino Nano” and Processor: “ATmega328p (Old Bootloader)”
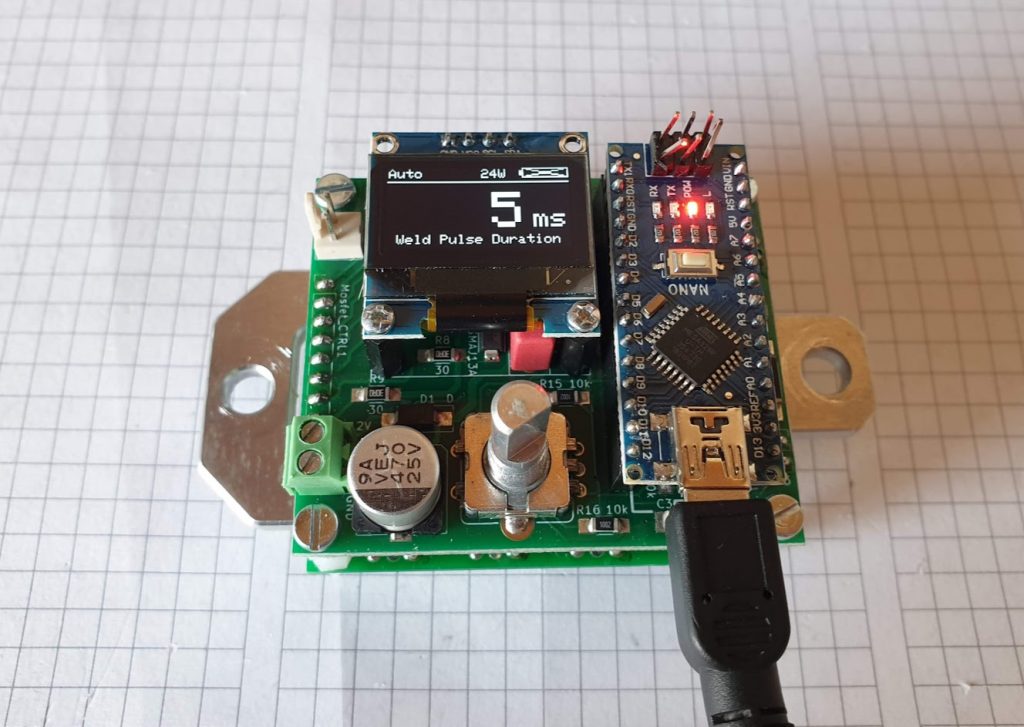
Finally click on “sketch -> upload” to write the programm into the Arduino Nano. When it is finished the Welder should reboot and the display should show the main screen
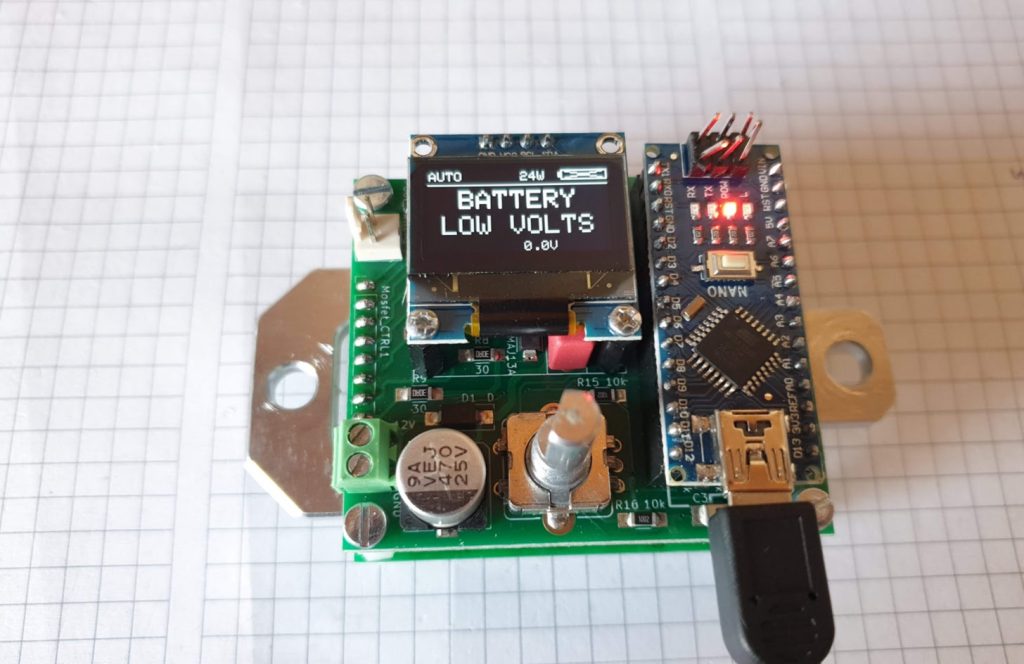
After about 15 seconds it will show a low battery waning because there is no battery connected to the green 12V input connector.
HI Marc, huge effort here and well done. I am only getting started using the Arduino IDE and have hit an issue straight up while compiling v3.3.2. I get an error “exit status #1” Error compiling for board Arduino Nano.
I have selected other boards but get the same error and associated with those boards selected. My goal is to be able to load the code onto a Mini Pro using the FTDI232 interface. Anyway, do you have any idea why I am getting this error?
Cheers
Hi,
Do you only get this error when compiling the Spot Welder Arduino Code ?
Did you try to you compile another Arduino Code and see if it works.
That error could be something wrong with your Arduino IDE. I have never seen it when compiling the code on my computer.
I had the same problem commented out the gfxfont.h and it worked
can confirm on IDE 1.8.10, latest adrafruit libraries work (Adafruit_GFX_Library-1.7.1, Adafruit_SSD1306-2.0.3). I followed the CH340 serial port/usb driver link above, it all Chinese. I used google translate to eventually find the CH341 drivers. this is a direct link, I think.
http://www.wch.cn/downloads/file/65.html
Kinda sketchy to me, if it has maleware, great, then we both have it ;). cheers . you can find me on the eskate forums at https://forum.esk8.news/u/arzamenable/summary.
can you just get the top board i popped the a9 vej 470 25v on the upper boards
yes thats possible. I think you alrady contacted me via e mail right ?
Hi Marc,
Great job, you put so much effort in developing this concept. I intend to build the spot welder more like an exercise for my skills. For now I only programmed the Arduino on a breadboard. Version 3.2.2 works, I actually played with the code to show some values, limits, even changed the batt gauge from 5 to 10 bars. By the way, I don’t understand the equation you use there for gauge. Simply put, Gauge=integer[N*(Vbat-Vbatlow)/(Vbatmax-Vbatlow)], where N is the number of bars in the gauge.
Version 3.3.4 doesn’t work, the Arduino does nothing, the Rx green led stays ON or flickers, nothing on the screen. Programming V3.2.2 did not work either. Then I realized that programming anything else will pull the Arduino from that state. I actually had to reflash the bootloader onto the Arduino Nano, using another Arduino Nano. I got the warnings, but it said bootloader uploaded. There are some warnings I get now when compiling, somewhere there is out of bounds number, something that I thought I changed accidentally, but the same message i get with original .ino file, something that I didn’t get when the first time v3.2.2 worked.maybe the libraries need to be changed?
I am an analog designer, coding is something I don’t master, I don’t understand what am I doing wrong here.
Anyways, the reason I played with the code is that I intend to modify it to work at 3V with a supercapacitor. A single 3000F/3V capacitor has a 2200-2400A max capability for miliseconds, with 1000A working current, so it should work. Do you have any practical experience with this low voltage? I did my calculations and the supercap has a very low dc impedance, 0.23-0.26miliOhm, so a 400A current will create a mere 100mV drop on the internal resistance, leaving 2.9V available for the rest of the circuit, but there are many unknowns related to total resistance of the circuit, even the screws force can add some tens of micro-ohms, the oxide/rust on the connectors can add something in time, etc. The entire resistance budget shows that using copper instead of aluminium, 2*500mm cables with 25mm^2 will do the job. I realized the jump start cables I have in the trunk of the car are the best quality and they just sit there.
In the code I have seen mentioned the 8.5miliohm total resistance, but I assume this includes the weld resistance, right? In this case, it seems that 2.9V is not enough to create 400A.
I don’t consider using two supercaps in series, they need balancing and monitoring, it’s too complicated. So, any advice on this regard? The supercap is 50-80euros (the same as a 50Ah lead battery) but I don’t like lead batteries and a Lithium-polymer 60C is costly and will wear out fast.
Thanks,
Florin
Hi,
Its hard to tell what went wrong when you instaled the 3.3.4 software. I have used it on many welders yet and there is no problem.
Only importance is when you update from an erlier version of the spot welder software to 3.3.4 you have to reset the eeprom of the Arduino Nano first.
https://www.arduino.cc/en/Tutorial/EEPROMClear
But on a “fresh” Arduino Nano that is not necessary.
Welding with the 3V capacitor may be a little problem. The 8.5 milli Ohm resistance was measured across the welder + both welding cables connected to each other.
So that is the minimum resistance you will get. That resistance does not include the screw connections of the welder to the car battery or the resistance across the fuse.
If we calculate 3V / 0.0085 Ohms that equals maximum possible current of about 350A. With the internal resisitance of the capacior + the additional resistance of connections you may only get 250 – 300A current.
That could be just enough to weld 0.15mm nickel strip on a very high pulse time. For thicker nickel strip i think it will be a problem.
Some time ago I did tests with 2pcs 12v capacitors in paralell powered by a 12V 10A power supply. That worked pretty good and equaled ybout the power of a 600A car battery.
Problem with this solution was that it costs twice as much as a car battery and the capacitors are huge.
Capacitors used were this ones: https://www.amazon.de/Hifonics-Kondensator-Pufferkondensator-Power-Stabilizer-Powercap/dp/B003P1F4WA
I upgraded to firmware from 3.3.3 to 3.3.4 and the voltage setting just would not register permanently. I ran the EEPROMClear code and reupload the firmware and it still could not register, so I just left it at 13.0V when it should be 12.6V. Is there a bug?
Do you mean the voltage calibration in the system menue ? That seems to have a bug. I just fixed that with a new Version.
https://github.com/KaeptnBalu/Arduino_Spot_Welder_V3/tree/master/Arduino%20Code/V3.3.5%20Arduino%20Code