During the last weeks we worked on a big software update for the Arduino Spot Welder which will add many new functions and also make the code more efficient. Read more to find out the details and how to upgrade your Spot Welder with the new software.
This update is basically a complete redesign of the Arduino code for the Spot Welder. A big thanks goes to John Fitter from Australia who did all the programming work after i told him about some of the new functions that would be nice to add to the Spot Welder. The code needed a complete redesign because the old one was to inefficient so there was no space left on the Arduino Nano for more functions. Because of this a lot of work went into the new Arduino code.
New Features:
- completely new Screen Layout (usable with 2 colour OLED display)
- debouncing of the rotary encoder for easier input
- voltage reading on the main display replaced with a battery bar
- redesign of the main menu with same functionality as before
- new system menu for screen rotation, battery voltage offset, max pulse time setting and system reset function
All prebuilt kits shipped from now on will come with this new Software. You can also update your existing Spot Welder on your own. All V3 and later Arduino Spot Welders are compatible. A tutorial on how to do this can be found here . But first lets take a closer look at the new features
The new screen layout:
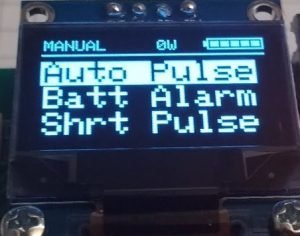
The main screen has been updated so it now has a status bar at the top and the weld time setting as big as possible on the rest of the screen. The status bar shows you the weld mode (auto or manual), the total welds that have been done and the battery bar.
On the battery bar the fully charged battery value is set 12.7 V. So for all voltages of your car battery above this value it will diplay all bars. The lower limit of the battery bar can be set via the “Batt Alarm” item in the main menu.
The “Auto Mode” will activate a welding pulse after a short delay when both welding tips touch the nickel strip. In “Manual Mode” you have to press the foot switch to activate a welding pulse.
By turning the rotary encoder you can set the weld pulse duration. The maximum is limited to 100ms by default. This maximum can be changed in the sytem menu if necessary.
The Main Menu:
You can enter the main menu by clicking the rotary encoder. The functions of this menu were not changed, but the design was improved. In the main menu you can
- switch between the “Auto” or “Manual” mode
- set the Auto Pulse delay time (delay before a pulse gets triggered when both welding tips touch the nickel strip)
- set the battery low voltage alarm (default 11.0 V) – this will be the lower limit of the battery bar and the limit to trigger the battery alarm screen.
- set the short pulse duration (default 12% of the pulse time). The short pulse is meant to preheat and clean the weld Spot before the main pulse happens. You can change it but 12% is usually a good working value.
The System Menu:
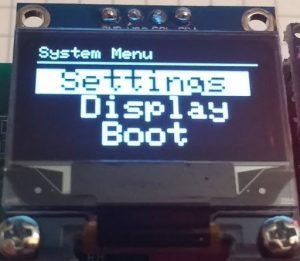
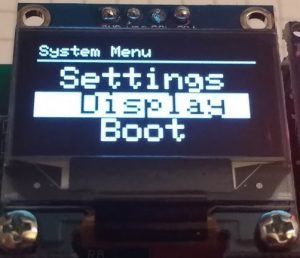
This menu is hidden during normal operation of the Spot Welder. You can enter the system menu by holding down the rotary encoder button and then powering up the Spot Welder. As soon as the system menu is displayed you can release the rotary encoder button. There are some new functions in this menu.
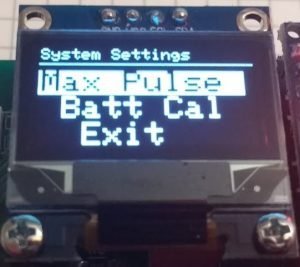
Functions in the settings sub-menu:
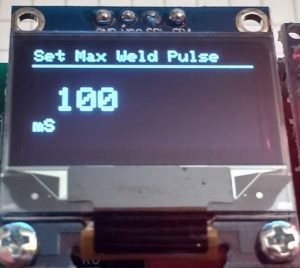
Max Pulse: sets the maximum welding pulse time that can be set during normal operation on the main screen. The default is set to 100ms. This should be enough for most users, since you can already weld 0.15mm nickel strip on 17ms pulse time with a 440CCA car battery. You can increase this value up to 500ms, however be carefull when using such high pulse times with a powerfull car battery. The mosfets legs may not withstand the high current for such a long time and melt.
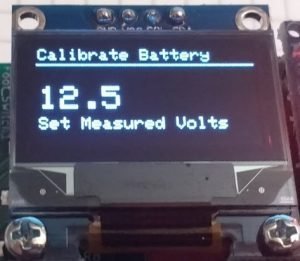
Batt Cal: here you can calibrate the measured battery voltage. Due to some parts tolerances the measured battery voltage can be off by 0.1…0.2V. The current measured battery voltage will be displayed. You then measure the actual battery voltage with a voltmeter and enter this value rotating the rotary encoder. Pressing the encoder button causes the offset to be re-computed and saved.
Exit: returns to the system menu
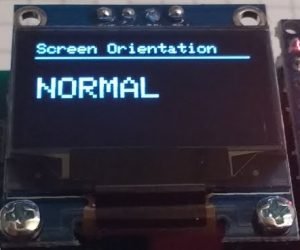
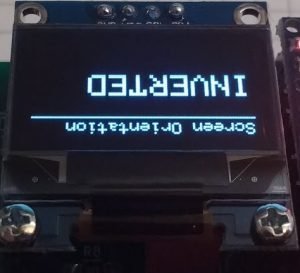
Display: this function can rotate the display by 180°. This is usefull in some mounting configurations of the Spot Welder so you dont have to read everything upside down. Please note that this function only makes sense with a single colour OLED display like on the prebuilt kits. If you are using a two colour display rotating the content 180° will work but it looks messed up.
Functions in the Boot sub-menu:
Please note that the reboot will only work if you do have the “OptiBoot” bootloader flashed to your Arduino Nano. How to do his is shown in the update tutorial. Without the bootloader the Arduino will go to an infinit reboot loop and start blinking. To reboot without the new bootloader simply wait about 5 seconds after you clicked reboot and then unplug power. After this power up the Spot Welder without pressing the rotary encoder to enter the normal operation mode (Main Screen). This also applies to the “Safe Reset” and “Full Reset” menu items.
Reboot: This will reboot the Spot Welder so you dont have to unplug power and power up again to leave the system menu.
Safe Reset: resets all values to factory default except the weld conter, the battery offset and the display orientation and reboots the Spot Welder
Full Reset: resets all values to factory default and reboots the Spot Welder



Nice device, just bouth the PCB, I hope it will do the job I need.
What about implementing energy calculation during welding? I.e. instead of welding time you set required energy level, then measuring current flow via mosfets using them as sense resistor? Would be enough nano CPU for the task?
This is a very good idea. To measure the voltage drop across the mosfets there will be some changes necessary to the Spot Welder and maybe some additional parts required.
The Atmega328 should be fast enough to do a measurement during the pulse. The calculation can be done after the pulse so that should be no problem. So just measuring the Amps should work.
For energy calculation the Atmega might be to “slow” and the program space left for new things in the Ardino Code is pretty limited.
Maybe it could use a STM32 processor in a future version. These things are much faster and have way more program and variable storage capabilitys.
But this will require a complete redesign and new program for the Spot Welder, so nothing to come soon.
I think the best option is to move forward and start using STM32F103 based “bluepill” which cost almost the same as nano, then being arduino compatible and almsot same formfactor it should be fairly easy to migrate, while gaining real power of 32 bits ARM at 72 Mhz…
http://www.stm32duino.com
Forgot to mention, what I mean is that actual welding time to be dependent from online energy calculation and cut the flow when reach the set point. In this way the weld result should be more consistent since you may provide the required amount of energy for every weld. There are many variables like impurities, electrodes pressure e.t.c. which change the joint resistance and thus time based weld will provide different result for different joints…
Nano I think wont do the job, however stm32F103 with easy…
Hi, very useful item. I reallt love it.
Now, I have a question: Is it possible to use a lipo 4s with this device ?? Like turnigy 5000mAh?
It can only be used with 3s Lipos or 12V car battery.
The maximum input voltage should not exceed 14V.
Actualy i use 25mm² diy cable
25mm² cable should work fine